DE X INSIGHTS
Electrical Protection Coordination for Home Interiors

You're probably here because the electrical plan for your home still sits in a separate PDF, while the interior drawings have already moved ahead with wardrobes, ceiling channels, kitchen modules, and wall finishes. That's when trouble starts. On Chennai sites, I've seen neat-looking homes end up with inaccessible distribution boards, combined wet and dry circuits, and nuisance trips that no one can explain because the electrical logic was never coordinated with the interior layout.
A flat can look complete and still be badly planned from a protection point of view. The most common mistake isn't poor workmanship alone. It's late coordination. Once the false ceiling grid is closed, the tall units are fixed, and tile lines are approved, every missed protection decision becomes either visible rework or hidden compromise.
Why Electrical Protection Coordination Belongs in the Interior Plan
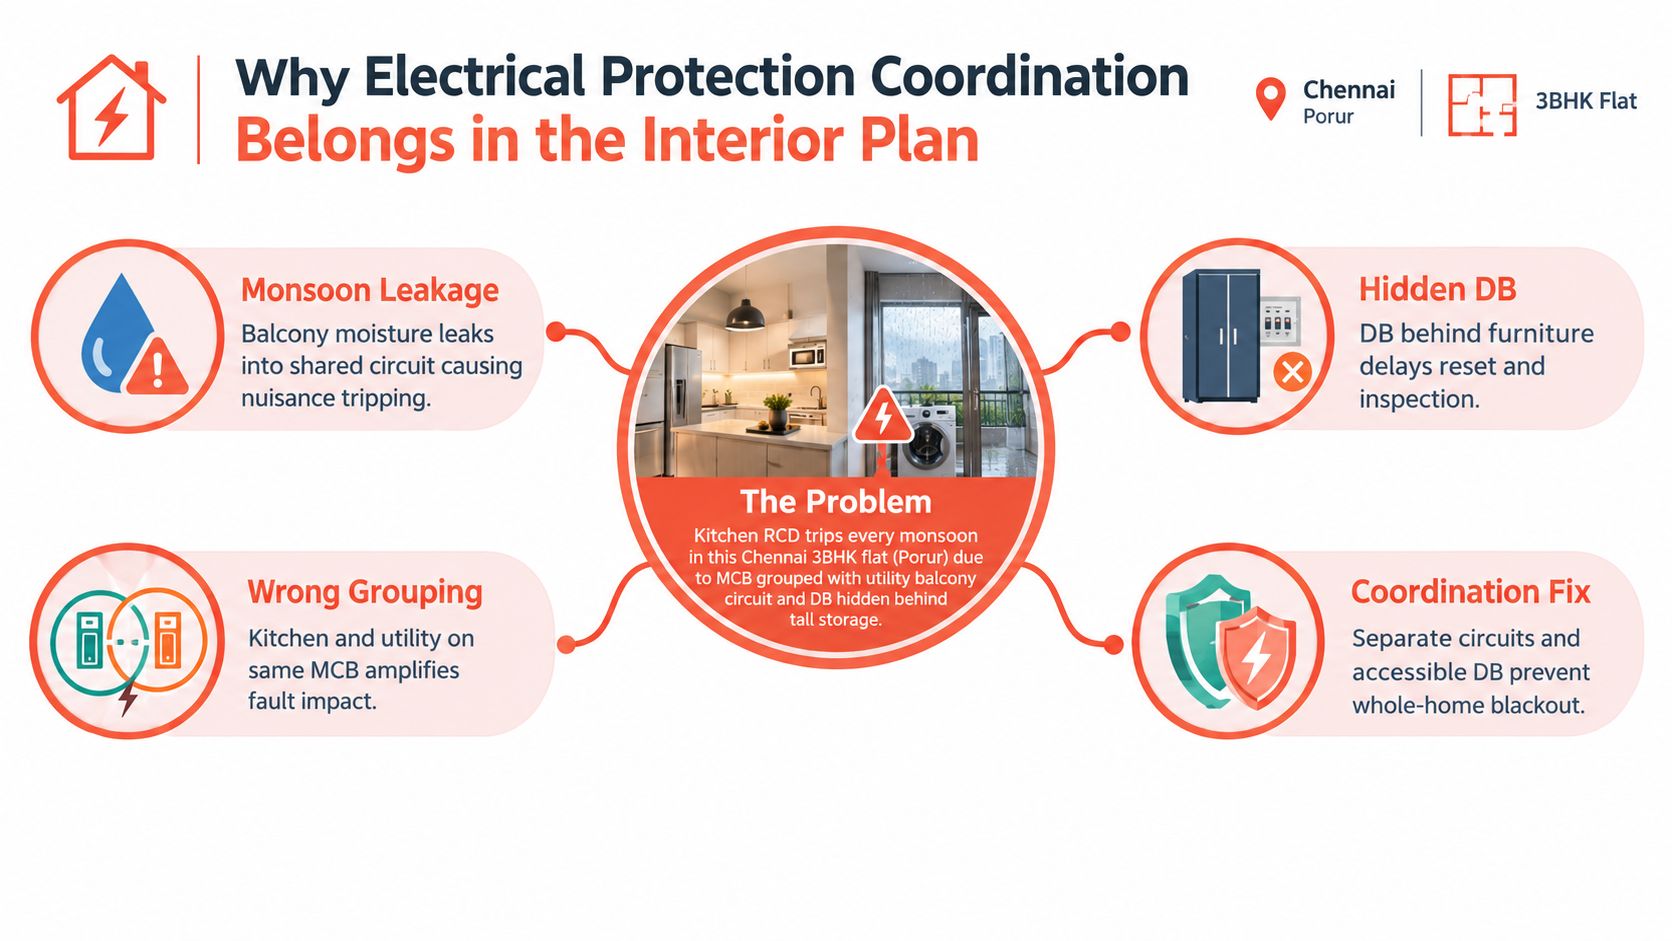
A Porur apartment is a good example. The kitchen RCD kept tripping every monsoon. On inspection, the kitchen line had been grouped with the utility balcony circuit, moisture exposure in one zone affected the other, and the DB sat behind a proposed tall storage unit. The electrician could reset it. The homeowner couldn't reach it easily, and the interior team had no marked drawing showing why those circuits had been grouped in the first place.
That's why electrical protection coordination doesn't belong at the end of the job. It belongs in the same discussion as kitchen carcass depth, loft shutters, access panels, and switchboard placement. In Indian practice, coordination is not just a preference. Grid-connected entities are formally required to coordinate protection systems, settings, and fault recording across connected assets under CEA and regional reliability requirements, with measurable fault quantities recorded for verification and post-fault analysis regional reliability standards. At home scale, the lesson is simple. Protection logic has to be designed, traceable, and reviewable.
Treat layout decisions as protection decisions
When a designer fixes the location of the tall unit beside the dining wall, that choice may block the DB door swing. When a kitchen planner combines the utility and kitchen on convenience grounds, that choice may widen the impact of one fault. When a ceiling drawing shifts light points after conduit is laid, somebody will either add surface rerouting or leave a hidden junction where you don't want one.
Practical rule: If the DB, MCB grouping, and RCD segregation aren't marked before module drawings are frozen, the site will solve the problem with compromise, not coordination.
A working interior electrical package should include:
Circuit zoning on the furniture plan so the team can see which loads sit behind each wall and cabinet face
DB access clearance marked early so no wardrobe shutter, crockery stack, or mirror panel blocks it
Wet-zone segregation so balconies, bathrooms, and utility areas don't take down unrelated dry areas
Serviceability notes so future testing and relabelling don't require dismantling finished carpentry
For homeowners who like reading broader field advice on site risk and practical safety habits, these business security tips Queensland are useful because they frame electrical safety as an operational habit, not a one-time install issue. That mindset applies at home too.
Planning Circuits and Load Estimation Room by Room
Most circuit problems start with a lazy schedule. Someone writes “kitchen sockets” or “bedroom points” and moves on. That isn't enough. A proper schedule starts room by room, appliance by appliance, and then ties each circuit to the actual finish and module it serves.
Start with actual loads, not generic room names
List every outlet and appliance in each zone. Then convert wattage to current using the site supply voltage and decide what must stay independent. In Chennai homes, this matters most in kitchens, bedrooms with study use, and living rooms packed with media gear, chargers, and decorative lighting.
A kitchen shouldn't be one vague power circuit. Mixer, induction hob, microwave, dishwasher, RO, and fridge don't behave the same way in daily use. Some deserve dedicated lines because they run continuously, some because they draw heavily, and some because you don't want one nuisance trip to affect food storage or water supply.
Room/Zone | Typical Loads (W) | Estimated Current (A) | Suggested MCB (A) | Dedicated Circuit |
|---|---|---|---|---|
Kitchen main appliance line | Varies by installed appliances | Load to be calculated from appliance schedule | 32A where design load justifies it | Yes |
Bedroom lighting | Varies by fixture count and driver load | Load to be calculated from lighting schedule | 6A | No |
Bedroom socket circuit | Varies by study, charging, and accessory use | Load to be calculated from outlet schedule | 16A | Yes, where usage is heavy |
Living room media | Varies by TV, soundbar, router, console | Load to be calculated from media schedule | As per calculated load | Often yes |
Living room general sockets | Varies by portable use | Load to be calculated from outlet schedule | As per calculated load | Usually separate from media |
A practical zoning method that works on site
Use this sequence:
Survey the room
Count fixed appliances, occasional appliances, decorative loads, and hidden service loads such as chimney, RO, mirror demisters, and cove drivers.Separate convenience from consequence
Don't group circuits because the conduit route is shorter. Group them by what happens when one trips.Protect occupancy-critical loads
Fridge, internet equipment, security devices, and selected lighting should not disappear because a balcony point leaked.Map the circuit to the finish
Write down which cabinet, pelmet, mirror, ceiling bay, or wall cladding the circuit feeds.
A bedroom usually benefits from separate lighting and socket circuits. A living room often works better when media sockets, ambient lighting, and general sockets are split rather than pooled. That also makes fault-finding quicker after handover.
The best circuit schedule is boring to read and easy to maintain. The bad ones look simple on paper and become confusing the first time a trip happens.
Shared neutrals, balcony points looped into indoor lines, and AC outdoor units tied carelessly into mixed runs are common site mistakes. They create confusing trips and ugly rework later. If backup power is part of the brief, checking a local vendor list like this Tn generator installer directory can help homeowners understand what dedicated loads usually need separate planning during fit-out.
For bedrooms, point planning and circuit planning should happen together, not in separate reviews. This guide on electrical points in bedroom is useful because it connects furniture use with actual electrical locations.
Placing MCBs, RCDs, and Distribution Boards Around Modules
A flat can have the right breakers on paper and still fail the resident the first time a trip happens. I have seen a DB buried behind a puja shutter, another blocked by a refrigerator side panel, and one more hidden inside a mirror cabinet where the door could not open fully once the handle was fixed. On site, that is not an electrical issue alone. It is an interior coordination failure.
DB placement should be decided with the module drawing open, not after carcasses, cladding, and shutter swings are frozen. In Chennai apartments, the final location usually gets squeezed by crockery units, utility tall storage, AC return lines, wall panelling, and entry foyers that the design team wants to keep clean. The trade-off is real. A neater wall often pushes the board into a cabinet bay. If that happens, the bay needs permanent clearance, a full-opening access door, and no daily-use storage in front of it.
A recessed DB usually sits better in residential work than a surface box because it disturbs the finish less. Height matters, but usable access matters more. Keep the board where an adult can open it, read the labels, and reset a device without pulling out baskets, moving jars, or calling the carpenter.
Place protection around how the home is actually built
I do not group devices by whichever conduit run looked shortest during rough-in. I group them by function, fault isolation, and what the interior package will hide later. Kitchen small-power lines, water heater circuits, air-conditioners, and general lighting should not be packed into a careless mix just because they pass through the same wall.
Selective tripping matters in homes. One leaking balcony point should not kill the router, fridge, and passage lights. BIS guidance on low-voltage switchgear and controlgear assembly design is useful here because it frames how assemblies are identified, documented, and arranged for safe operation and maintenance BIS adoption aligned with IEC 61439 concepts. On site, that translates into a simple rule. A resident should be able to identify the faulty circuit quickly and keep the rest of the home usable.
The board face and the joinery around it need coordinated checks before fabrication starts:
DB door swing must clear adjacent shutters, handles, and wall lights
Cabinet depth must allow wiring bend radius and termination space, not just the flush frame
Removable access panel details must be frozen before laminate, veneer, or paint finish begins
Circuit labels must match the final built condition, including renamed rooms and revised module use
RCD test access must stay open after mirrors, shoe units, or service doors are installed
Labels deserve more attention than they usually get. Marker pen on masking tape does not survive dust, repainting, or final cleaning. I prefer engraved identification, especially where the board sits inside a utility or service cabinet and gets handled during maintenance. These durable laser engraved switchboard labels show the standard of marking that holds up better after handover.
One more site rule saves a lot of rework. If the carpentry team is asking for the DB cut-out after shutters are made, coordination is already late. At that stage, the usual outcome is chipped laminate, a compromised opening, or a board that works electrically but looks forced into the interior.
Earthing Strategies and Cable Routes That Respect the Finish
A wall can look perfect at handover and still hide a bad electrical decision. I have seen this in Chennai flats where the laminate lines are sharp, the false ceiling is neatly painted, and one earth continuity issue or badly planned reroute forces cutting into finished work within weeks.
Earthing has to be checked as part of the interior plan because route choices, access panels, wardrobe backing, ceiling drops, and wet-area detailing all affect how safely the installation will behave after possession. The building supply may provide the base arrangement, but the fit-out team still decides how conductors are extended, where joints stay accessible, and whether future testing can happen without breaking finished surfaces.
Confirm the earthing arrangement before the route is frozen
Residential teams will hear TT, TN-S, and MEN in meetings, but on apartment interiors the question is simpler. What has been provided at site, and what does your final fit-out depend on?
I treat that as a document-and-site verification item. Check the builder's electrical drawings, inspect the meter room or riser details available to the project team, and confirm that the final DB scheme matches that arrangement. If there is a mismatch, stop the routing decision there. Protection settings and earthing assumptions have to align with the actual installation conditions, as noted earlier in the article's standards reference.
Earthing / Route | Impact on Protection | Finish Compatibility | Chennai Site Reality |
|---|---|---|---|
TT | Usually depends heavily on correctly chosen RCD protection and reliable earth continuity | Can work with concealed or surface routes if test access is maintained | Needs confirmation of the earth path, not verbal assurance |
TN-S | Gives more predictable fault-return conditions where properly provided | Fits concealed interior work well when conductor identification stays clear | Must be verified from the building infrastructure actually handed over |
MEN | Needs clear understanding of neutral-earth bonding within the supply arrangement | Can be built neatly, but only with the right supply-side confirmation | Should not be assumed in apartment fit-outs |
Concealed conduit in wall | Supports a clean finished surface | Best visual result when completed before plastering | Late changes usually lead to wall cutting and patchwork |
Surface trunking behind wardrobes | Easier to alter and service | Acceptable where fully hidden by storage or utility joinery | Useful in renovation work and in walls that should not be chased again |
Flexible false-ceiling drops | Helps align light and fan points with the final reflected ceiling plan | Works well in controlled access zones | Becomes untidy when ceiling layouts keep shifting |
Route cables with the joinery and ceiling package, not after them
On site, cable routes usually fall into three practical groups. Concealed conduit in masonry walls gives the cleanest finish when the point locations are already fixed. Surface trunking works where wardrobes, utility units, or boxed service zones can hide it properly. Flexible drops above a false ceiling are fine for lighting and selected low-current points, but only when the ceiling grid, access trap positions, and cut-outs are already coordinated.
The trouble starts when the electrical route is treated as separate from the interior package. A wardrobe side panel lands over a junction point. A mirror blocks service access. A ceiling drop comes exactly where the AC drain, cove frame, and downlight cluster are competing for space. Then the site team starts improvising, and the finish pays for it.
In Chennai homes, I prefer to freeze routes against real built elements. Kitchen wall units, loft shutters, vanity mirrors, bed back-panels, curtain pockets, and false ceiling members matter more than a neat line on the electrical drawing. If the ceiling design is still evolving, this guide to smart false ceiling planning in Chennai is useful because it connects service access and point locations to the ceiling layout early.
One practical rule saves rework. Do not bury a junction, earth inspection point, or cable transition behind a fixed decorative finish unless there is a planned access detail that the carpentry team has drawn and built. That is the difference between an interior that photographs well and one that can be maintained without damage.
Lighting Control and Safety Coordination on Site
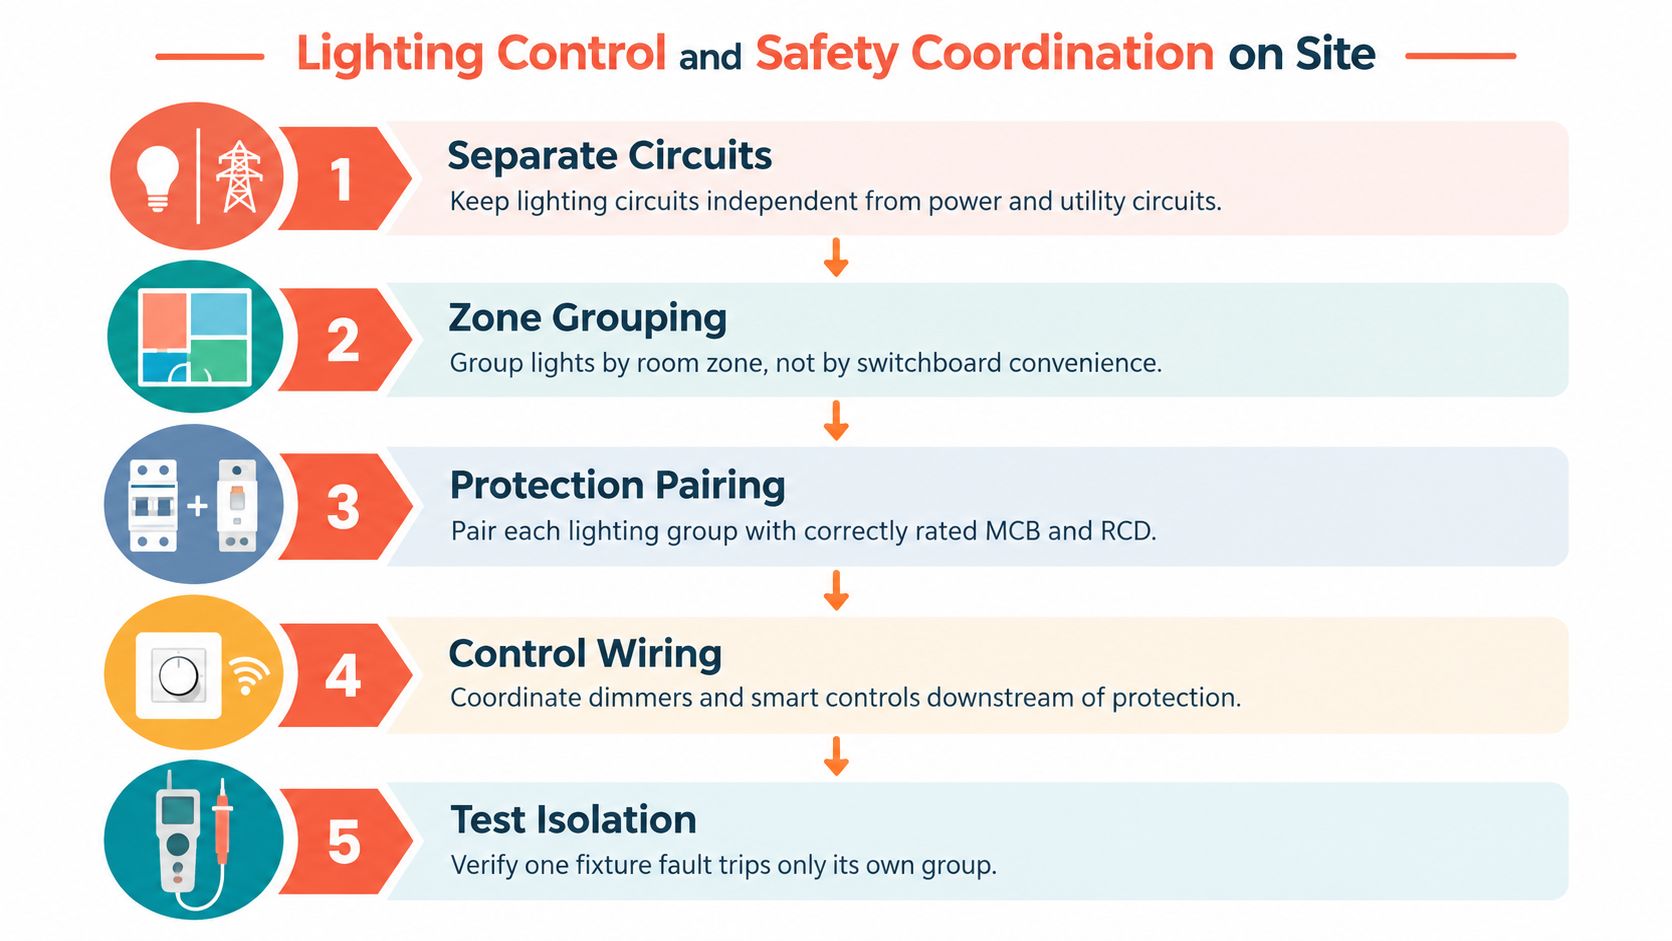
Lighting faults feel disproportionate in a finished home. One driver leaks or one fitting fails, and suddenly an entire room goes dark because the grouping was done for installation ease instead of operational sense.
Group by room behaviour, not switchboard convenience
Lighting circuits should stay separate from socket circuits. That sounds basic, but it still gets blurred during fast apartment fit-outs. Smart controls make it more delicate because dimmers and automation modules often need neutrals, deeper back boxes, or dedicated planning before conduit is pulled.
Bathroom and balcony lighting deserve extra caution. Where additional protection is required by the chosen scheme and applicable devices, don't let those points drag an unrelated dry room into the same trip event. Also remember that BIS guidance for low-voltage systems requires selectivity between multiple residual current devices so a local fault doesn't trip the whole installation BIS low-voltage selectivity guidance for RCDs.
The on-site sequence matters more than people admit
I prefer this order on active sites:
Ceiling mark-out with the interior drawing in hand
Don't mark by memory. Use the reflected ceiling plan and furniture edges together.Conduit drop points against the final grid
Not the draft grid. The approved one.Switchboard back-box heights locked with furniture
Wardrobes, headboards, vanity mirrors, and TV panels change usability fast.Polarity and earth continuity checks before closure
Once POP or gypsum is closed, testing becomes slower and more expensive.
One leaking fitting shouldn't darken the room, the passage, and the balcony together. If that happens, the grouping failed before the home was occupied.
Where the project needs an integrated design-and-execution approach, Interiors by DeX is one option that includes electrical planning and lighting coordination as part of residential interior work in Chennai. That sort of joined-up scope helps because the ceiling, modules, and electrical decisions affect one another directly.
Pre-Handover Safety Checks and the Coordination Checklist
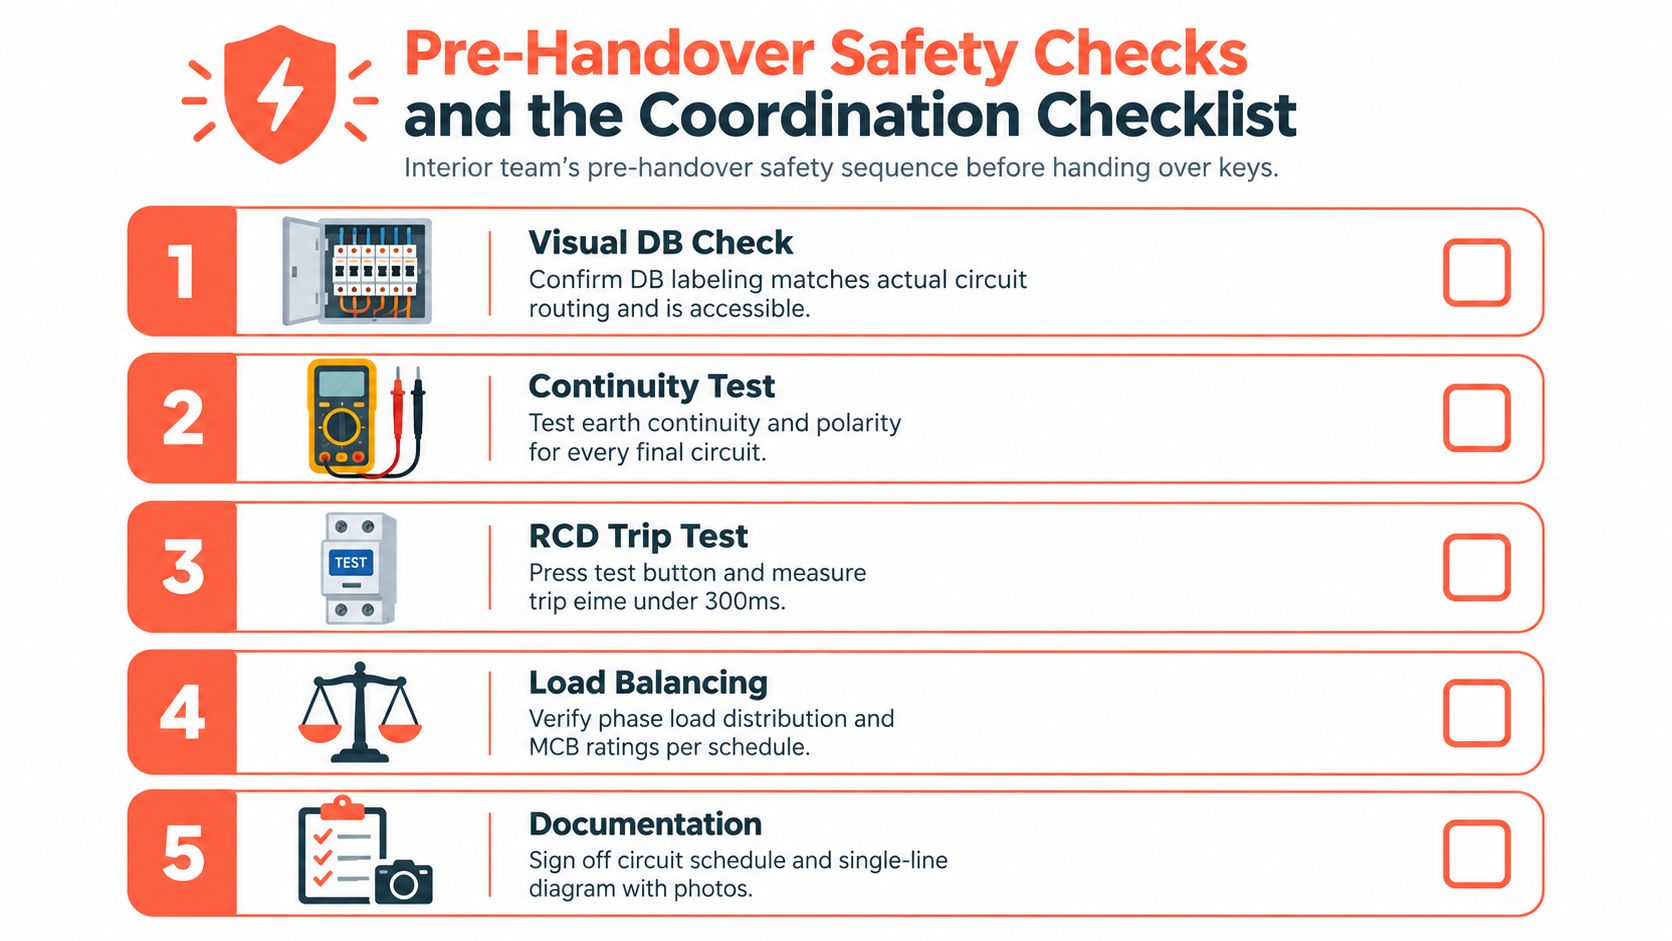
The handover stage is where many teams reduce serious electrical review to a sign-off form. That's a mistake. Protection coordination should be proven before keys change hands, and the proof should connect directly to the as-built home.
The checklist that matters in a finished residence
Start with a visual inspection. Check whether DB labels match the installed circuits. Then test insulation resistance with a 500 V megger, verify earth continuity and loop behaviour at sockets, and confirm polarity across lighting points. RCD testing should be recorded properly, not just “test button pressed”.
For larger power systems, India's safety regulations set clear maximum fault clearance times of 100 ms for 765 kV and 400 kV systems and 160 ms for 220 kV and 132 kV systems CEA regulations compendium. Homes don't use those voltage levels, but the discipline behind them matters. Settings and protective operation must be treated as measurable performance, not assumption.
Coordination now means proof and record-keeping
Recent Indian utility practice shows protection is increasingly a governance issue, with audits, central records, and formal review workflows. CEA-related grid code material requires a formal protection-coordination study, coordination with connected parties, and maintenance of a repository of protection settings and events protection coordination and audit requirements. For residential interiors, the direct takeaway is that documentation has become part of the job.
Bind a handover pack that includes:
Single-line diagram updated to the as-built condition
DB schedule matching physical labels
Test certificates for the electrical checks performed
Earthing photograph and accessible service records
Circuit identification notes so the homeowner can isolate faults without guessing
For clients who want a broader move-in review, this handover day checklist for Chennai home interiors is a useful companion to the electrical sign-off set.
Keeping Protection Coordination Alive After Handover
A well-coordinated home feels uneventful to live in. The right breaker trips when there's a fault. The rest of the house stays on. The resident can identify the problem quickly, reach the DB, and understand what happened without calling three vendors.
Treat the documentation as a living asset
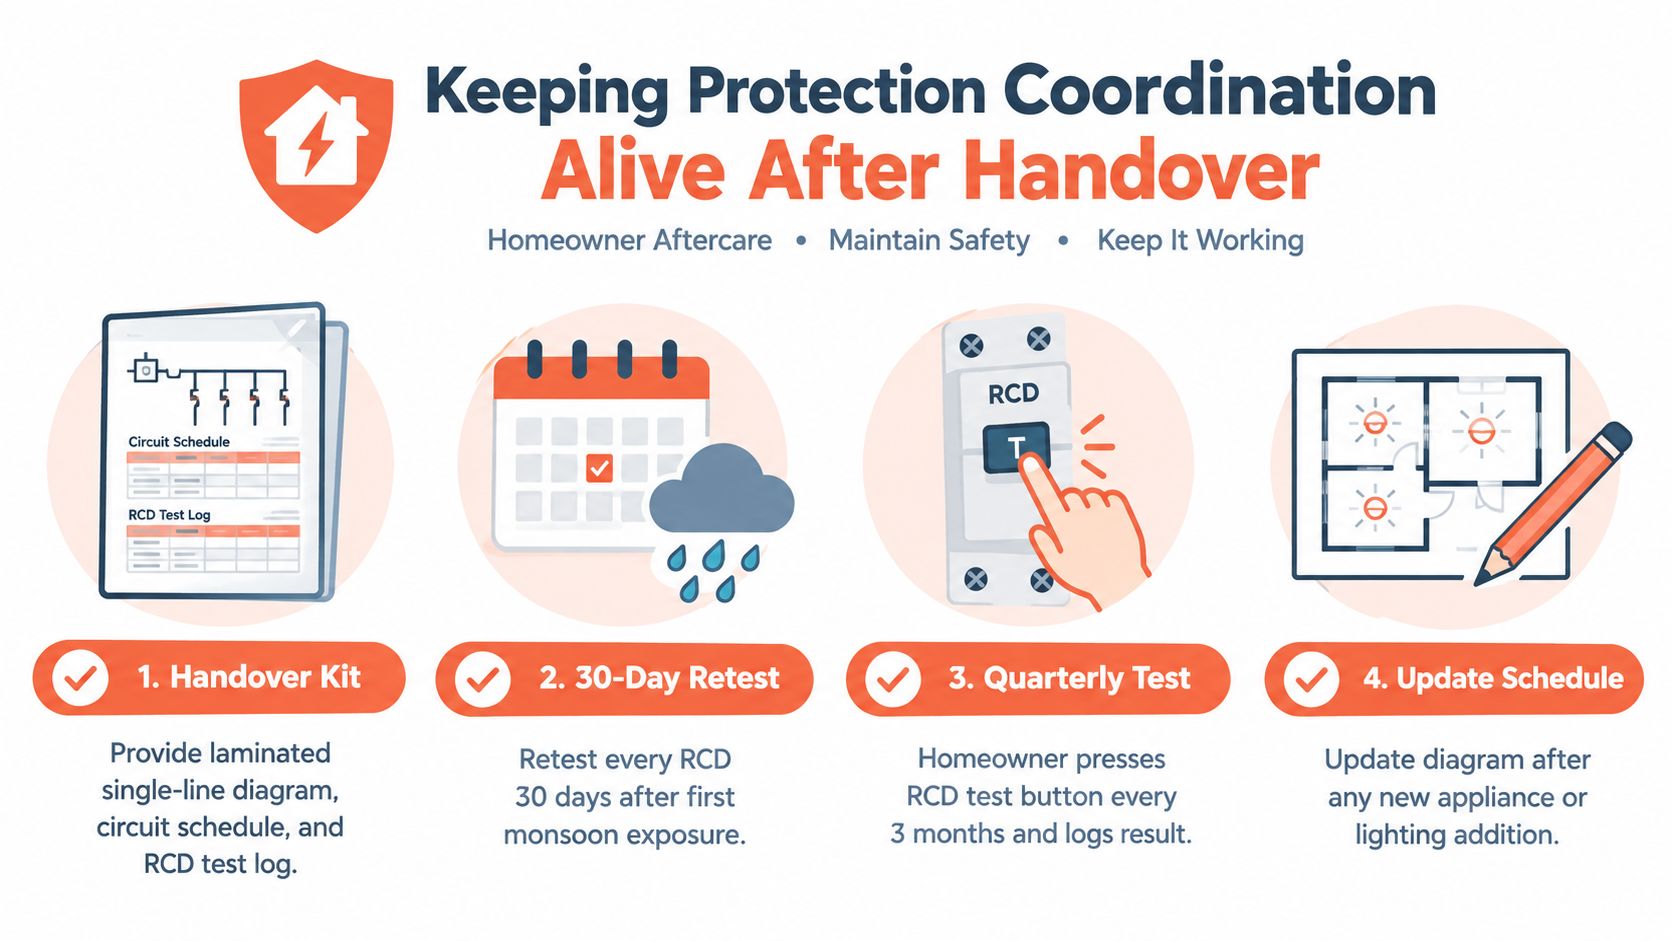
Give the homeowner one laminated single-line diagram, an updated circuit schedule, and the RCD test log at possession. Store cable route photos, ceiling cut-out dimensions, and earthing records in a cloud folder the homeowner controls. If a light gets added, a study table moves, or an induction cooktop arrives later, update the record.
Indian engineering literature already reflects why settings can't stay frozen in changing systems. A practical workflow includes collecting single-line diagrams and ratings, modelling the network, running short-circuit studies for normal and contingency states, generating time-current curves, verifying multiple fault cases, and then issuing settings for implementation. The same literature notes that rising distributed generation can increase fault current by 10 to 20%, reduce grid-current contribution by 10 to 15%, and force relay-current-setting changes of about 30 to 40%, which is why adaptive protection is being recommended in those contexts engineering workflow and DG impact. In homes, the principle carries over qualitatively. The more inverter-based equipment, backup sources, and retrofit loads you add, the less sensible it is to treat the original electrical setting plan as permanent.
Ownership doesn't end on handover day
Recent draft grid-code documents in Tamil Nadu and Gujarat treat protection coordination as an ongoing committee-driven process with periodic review and centralised records, not a one-time design action Tamil Nadu gazette draft reference. At residential scale, nobody needs a committee. But somebody does need ownership.
That means one resident should know how to read trip indicators, test the RCD periodically, and log nuisance events before resetting. It also means the interior team should be ready to review the electrical schedule when the homeowner adds new loads, remakes the utility, or changes the ceiling layout during future upgrades.
A finished wall hides the system. It doesn't remove the need to understand it.
Protection coordination works best when it's invisible in daily life and visible in the records when needed.
Interiors by DeX plans and executes Chennai home interiors with the electrical and lighting layout considered alongside modules, ceilings, and handover documentation, so the finished home doesn't hide preventable service problems behind good-looking joinery. If you want a residential interior team that treats protection access, circuit planning, and finish coordination as part of the job, visit Interiors by DeX.